RustDesk Relay Access

Secure Remote Support via rd.44r0n.cc

Follow the steps below to connect to the private RustDesk relay hosted at rd.44r0n.cc. Once we swap contact details in private, I'll send you a short-lived access link that unlocks the server config string on this page for a few minutes. Copy it into RustDesk using the clipboard icon 📋 in the ID/Relay dialog—keyboard paste is ignored there.

View Paste Steps

Server Config String

Locked

Open the access link on the device where RustDesk is running to unlock the server config string. Tokens expire quickly for safety.

Locked

Quick Reference

  • Relay Server ID rd.44r0n.cc
  • Relay Self-hosted relay
  • Server Config String Unlock with the short-lived link I send once we connect privately.
  • Encryption End-to-end via RustDesk relay
  • Availability 24/7 (planned maintenance announced)

What to Expect

This guide walks you through preparing RustDesk, applying the rd.44r0n.cc server config string, and confirming your connection on both Windows and Linux. Keep the server config string private—it becomes visible only when you open the short-lived access link that contains the relay credentials.

Before You Start

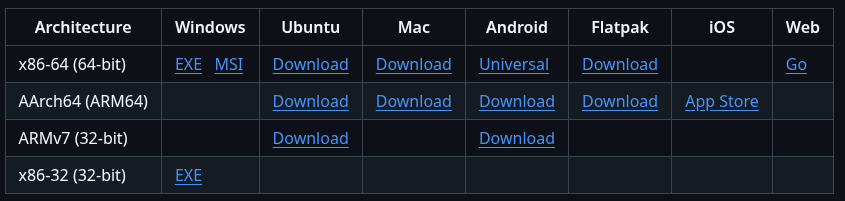
  • Grab the RustDesk app for your computer from rustdesk.com.
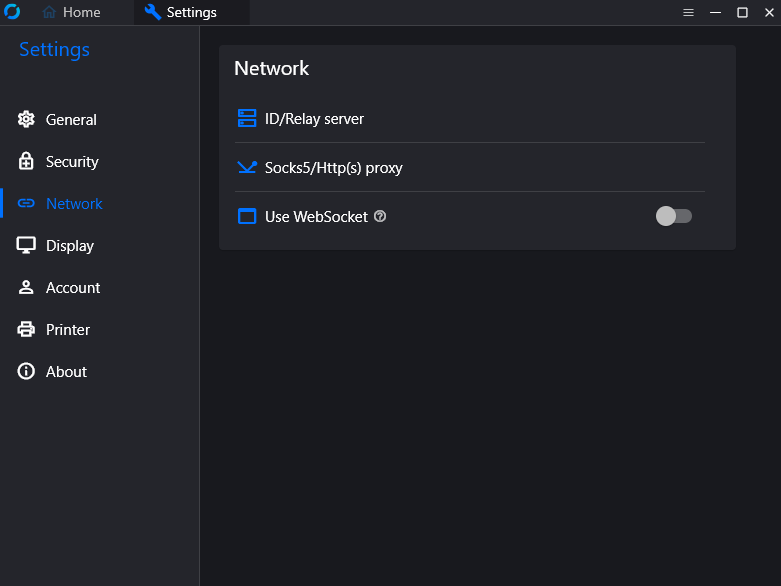
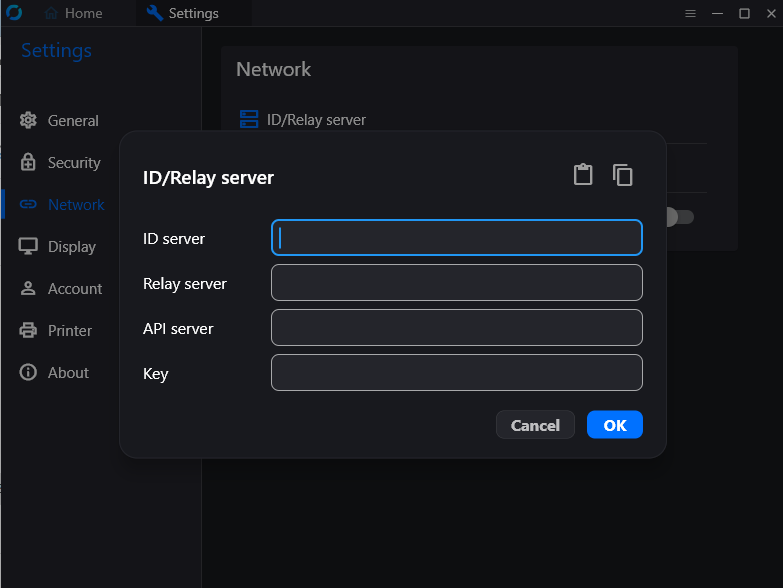
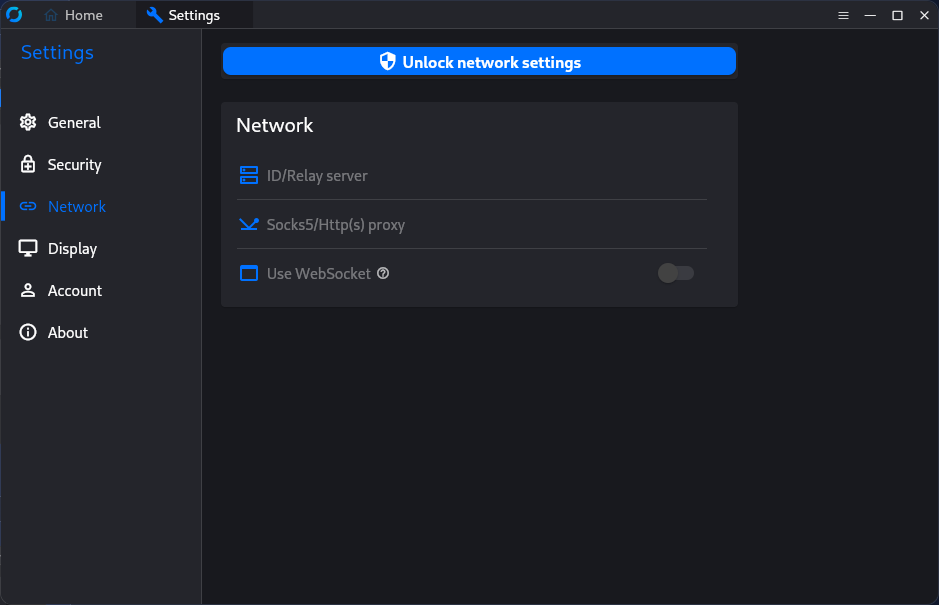
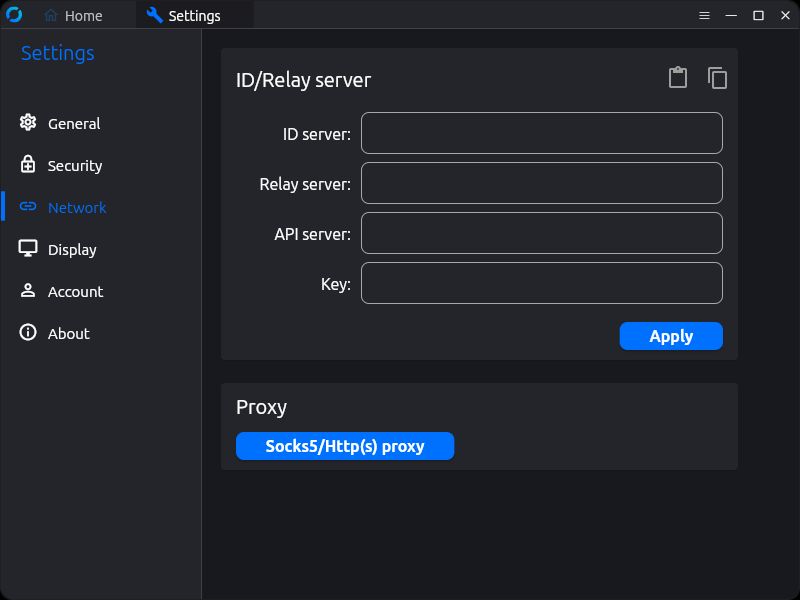
  • When you're ready to configure RustDesk, open the short-lived access link I shared so the page can reveal the server config string for you to copy.
  • Keep the relay address rd.44r0n.cc handy in case you ever need to confirm the connection.

Security First

  • The server config string is shared by everyone connecting through this relay. Please keep it private.
  • When a session starts, you will always get a prompt asking you to allow remote access. Click Allow only when you recognize the helper.
  • All traffic is encrypted by RustDesk and stays inside this self-hosted relay—no third party can read it.

Support

  • Spot an issue? Refer to the troubleshooting section below.
  • Need hands-on help? Reach out through the same private channel we used for your access link.
  • If things still feel confusing, send a note and we can walk through it together.

Step-by-Step Guide

Pick Windows or Linux below. The walkthrough shows how to paste the server config string using RustDesk's clipboard icon 📋 (keyboard shortcuts will not work in that dialog), with pop-ups offering extra detail when you want it.

  1. Download RustDesk

    Visit rustdesk.com and click Download. On the GitHub release page (for example, 1.4.3), expand the Assets section and choose the Windows build you prefer:

    • RustDesk-1.4.3.exe — portable version; double-click to run it once.
    • RustDesk-1.4.3-x86_64.msi — installer; sets RustDesk up for future sessions.
    RustDesk GitHub release page with the Windows assets highlighted
    Choose the MSI if you want RustDesk installed, or the EXE for quick portable use.
  2. Launch RustDesk (optional install step)

    Open RustDesk. If you expect to use it regularly, click the Install button in the lower-left corner so the helper service runs without extra prompts. Otherwise, keep using the portable session.

    RustDesk home screen showing the Install button in the lower-left corner
    Installing now avoids future User Account Control pop-ups.
  3. Open Network settings

    Click the menu icon next to your ID: the vertical dots or the stacked lines near the top. Choose Settings, then click Network on the left.

    RustDesk main window highlighting the menu icon to open settings
    Use the menu icons to reach Settings > Network.
  4. Unlock and open ID/Relay Server

    At the top of the Network page, click Unblock network settings if it appears and enter your Windows password. Then choose ID/Relay Server to open the connection dialog.

    RustDesk Network page showing the Unblock network settings button and ID/Relay Server option
    Unlock the settings, then open the ID/Relay Server dialog.
  5. Paste the server config string

    Click the clipboard icon 📋 in the dialog to paste the server config string you unlocked on this page—keyboard shortcuts or right-click paste will not work here. RustDesk fills the required fields for you; make sure ID Server and Key show values, then press OK to save.

    RustDesk ID/Relay Server dialog with the clipboard paste icon ready
    Use the paste icon to drop in the server config string—RustDesk fills everything and the ID/Key fields should now show values.
  6. Confirm you're on the relay

    Return to the main RustDesk window. The bottom status bar should read Ready with a green dot. If you still see “For a faster connection, please setup your own server,” paste the server config string again.

    RustDesk window showing the Ready status with a green indicator

    Looks good—you're on rd.44r0n.cc.

    RustDesk status bar showing Ready with the faster connection warning

    Warning—paste the server config string again.

    Match your status bar to the green Ready example. The warning means the config didn’t stick.

Ready to connect?

If you see the green Ready status without warnings, double-click your RustDesk ID to copy it (or select and copy), then send it to me so I can confirm the connection and start helping.

Troubleshooting Checklist

Ran into a hiccup? Start here. These fixes cover the most common connection issues with the relay.

Connection Timeout

  • Reopen Settings > Network and click the clipboard icon 📋 again to reapply the server config string. The ID Server field should display rd.44r0n.cc once it sticks.
  • If you manage your router or firewall, allow outbound ports 21115–21119 to rd.44r0n.cc.
  • Pause VPNs or extra firewalls briefly to see if they are blocking the relay.

Server Config String Errors

  • Make sure you paste the entire server config string—it starts with = and should have no extra spaces.
  • If RustDesk reports an error, reopen the access link and copy a fresh server config string before retrying.
  • I rarely rotate the server config string; if it suddenly stops working, reach out and I'll confirm or replace it.

Performance Issues

  • Switch to the UDP Hole Punching option in RustDesk if both endpoints permit it.
  • Check network latency with ping rd.44r0n.cc and investigate if >100 ms.
  • Verify both devices have sufficient upload bandwidth.

Audio or Clipboard Sync Missing

  • Reopen ID/Relay Server and confirm the server config string is applied (the fields should stay populated).
  • Update to the latest RustDesk client version.
  • Reauthorize the session; some features require a new handshake.

Frequently Asked Questions

Quick answers to the most common questions about this relay.

How do I request the server config string?

Send a quick message through the private channel we agreed on (email, Signal, Matrix, etc.). I'll reply with a short-lived link you can open on the RustDesk device to unlock the server config string here.

What happens if the relay is offline?

Planned maintenance windows will be announced ahead of time. If you experience unexpected downtime, check the troubleshooting section and reach out for assistance.

Are sessions recorded or monitored?

I do not record sessions unless there is a good reason to document what was done. If recording ever becomes helpful, you will be asked beforehand and can opt out. You are always in control and can revoke access at any time by requesting a refreshed server config string.

Is there a Linux service mode option?

Yes. RustDesk can run as a system service on Linux for persistent connectivity. Configure the values from the server config string in the service configuration file before enabling it.